
Installation
This guide walks through a fresh install on a clean Ubuntu 24.04 VPS. The full path is prerequisites → download → install → publish DNS records, and the curl | sudo bash one-liner is interactive — you’ll be prompted to confirm the hostname and admin email it auto-detects from your VPS’s reverse DNS.
Steps at a glance
Section titled “Steps at a glance”- Prerequisites — enable SSH on the VPS, update Ubuntu, set reverse DNS (PTR), and request port 25 unblock from your provider.
- Download — run
curl -fsSL https://get.vectismail.com | sudo bash. The script places the binary, installs Docker if missing, and seeds secrets. - Preflight — run
vectis preflightto confirm OS version, ports, and Docker are ready. - Install — run
vectis installto deploy the stack, run database migrations, and create the admin account. - Publish DNS records — A record at your registrar; PTR at your VPS provider.
- Verify the install —
vectis statusplus a successful login athttps://your-mail-host/admin.
Prerequisites
Section titled “Prerequisites”Before running the installer, make sure your VPS is in the right state.
1. Enable SSH access to the VPS
Section titled “1. Enable SSH access to the VPS”Many VPS providers (BinaryLane and Hetzner among them) ship Ubuntu images with password-based SSH disabled — /etc/ssh/sshd_config ships with PermitRootLogin prohibit-password, and no non-root user is created. If you try to ssh root@your-vps immediately after provisioning, the connection will be refused.
You have two options:
(a) Add your SSH public key at the provider’s panel. Most providers let you paste a key into the VPS config before (or shortly after) it boots. With the key installed, ssh root@your-vps works immediately, and nothing else is needed here.
(b) Use the provider’s web console to create a sudo user and enable password SSH. Open the web console (BinaryLane calls it “VNC”; DigitalOcean “Droplet Console”), log in as root with the initial password the provider emailed you, then:
# Create a non-root user with sudoadduser vectisusermod -aG sudo vectis
# Allow password-based SSH for this user (optional — key-based is preferred)# Edit /etc/ssh/sshd_config: set "PasswordAuthentication yes"sudo systemctl reload ssh
You only need this step once. Everything else in this guide assumes you can SSH into the box.
2. Update the OS
Section titled “2. Update the OS”On a fresh VPS, bring the base packages up to date:
sudo apt update && sudo apt upgrade -yIf a kernel upgrade is included, reboot before continuing:
sudo reboot3. Set reverse DNS (PTR) at your VPS provider
Section titled “3. Set reverse DNS (PTR) at your VPS provider”PTR (reverse DNS) is a hard requirement, not a nice-to-have. Without a matching PTR record, your outbound mail will be rejected as spam by Gmail, Outlook, and most receiving servers — and the deliverability check in the Setup Wizard will fail.
Do this at your VPS provider’s control panel (BinaryLane, Hetzner, DigitalOcean, etc.) — not at your DNS registrar. Some providers expose it as a simple field; others require a one-time support request (same channel as the port 25 unblock below). The PTR record for your server’s public IPv4 should resolve to the FQDN you intend to use for mail (e.g. mail.example.com).
Verify it from any machine once set:
# Expect output like: 203.0.113.10.in-addr.arpa name = mail.example.com.dig -x YOUR_SERVER_IP +shortThe installer looks this up for you and, if it resolves, pre-fills your mail-server hostname automatically — you just press Enter. If PTR isn’t set when you run the installer, you’ll have to type the hostname manually and fix the PTR afterwards.
4. Request port 25 unblock
Section titled “4. Request port 25 unblock”Most VPS providers block outbound port 25 by default to prevent spam abuse. Without it, your server can send to itself but not to anyone else. Check your provider’s documentation for “SMTP unblock” or “port 25 unblock” — usually a one-time support request.
System requirements
Section titled “System requirements”| Resource | Minimum | Recommended |
|---|---|---|
| OS | Ubuntu 24.04 LTS | Ubuntu 24.04 LTS |
| CPU | 2 vCPU | 4 vCPU |
| RAM | 2 GB (without ClamAV) | 4 GB+ |
| Disk | 30 GB SSD allocation (~20 GB free after OS install) | 100 GB+ SSD |
| Inbound ports | 25, 80, 443, 465, 587, 993, 995 | + IPv6 |
Docker is installed automatically by the script if it isn’t already present.
Picking a resource profile
Section titled “Picking a resource profile”From v0.1.13, Vectis applies per-container memory ceilings keyed off a resources.profile knob in /etc/vectis/config.yaml. Limits are hard cgroup ceilings — if a service tries to exceed its limit, only that container’s cgroup OOM-kills it, never the whole host. Pick the profile that matches your VPS RAM; the installer defaults to small for a 4 GB VPS.
| Profile | Base install | + Webmail + Loki/Promtail/Grafana | + ClamAV small | Suits |
|---|---|---|---|---|
dev | ~1.8 GB | ~2.6 GB | ~3.6 GB | Laptop / 2 GB VPS |
small (default) | ~3.5 GB | ~4.6 GB | ~6.1 GB | Single-domain 4 GB VPS |
production | ~6.7 GB | ~8.0 GB | ~10 GB | Multi-domain 8 GB VPS |
enterprise | ~13.5 GB | ~16.5 GB | ~19.5 GB | High-volume 16 GB+ |
“Base” is postgres + valkey + api + orchestrator + traefik + postfix + dovecot + rspamd — the always-on services. Each optional service (webmail, observability stack, ClamAV, pgbouncer, cert-extractor) adds its own profile-scaled ceiling on top.
To switch profile after install: edit /etc/vectis/config.yaml, change resources.profile, then vectis update apply. The brief container restart that follows picks up the new ceilings.
Download
Section titled “Download”Run the one-liner. It downloads the binary, installs Docker if needed, seeds randomly-generated secrets, and prompts you to confirm the hostname.
curl -fsSL https://get.vectismail.com | sudo bashYou’ll see prompts like:
[INFO] Detected public IPv4: 203.0.113.10[INFO] Reverse DNS (PTR): mail.example.comMail server hostname [mail.example.com]:TLS / admin email [[email protected]]:Press Enter to accept the defaults the script detected, or type to override. If your VPS doesn’t have PTR set, the prompt defaults to a placeholder and you’ll need to type your FQDN manually.
When the script finishes you’ll see:
======================================================== Vectis downloaded successfully========================================================
  The binary is in place but nothing is running yet. Next steps:
    1. Review /etc/vectis/config.yaml (hostname: mail.example.com)    2. vectis preflight    # verify system + ports + DNS    3. vectis install      # deploy containers, run migrations, create admin
This step only puts the binary on disk — it doesn’t start anything. The next two steps do.
What if I want to run it non-interactively?
Section titled “What if I want to run it non-interactively?”Pipe the script with no TTY (e.g. unattended cloud-init), and it’ll skip the prompts. It writes the detected PTR if there is one, or leaves the placeholder for you to edit /etc/vectis/config.yaml by hand. The next step (vectis install) will refuse to proceed if it finds the placeholder.
Preflight
Section titled “Preflight”Verify the system is ready:
vectis preflightThis checks OS version, CPU/RAM, port availability (25, 80, 443, 465, 587, 993, 995), outbound port 25 reachability, Docker version. Anything red here will block install — fix and re-run.
Install
Section titled “Install”vectis installThis is the heavy lift — about 11 steps over 1-3 minutes depending on your network speed. It generates service configs, writes the docker-compose file, pulls all images, brings Postgres up first and waits for it to be healthy, runs database migrations, creates the initial admin account, then starts the rest of the stack.
When it finishes you’ll see:
═══════════════════════════════════════════  Vectis is ready!
  Admin URL:      https://mail.example.com/admin  Admin email:    [email protected]  Admin password: a3f9c2b1e5d7891f
  !! SAVE THE PASSWORD ABOVE — it is shown only here, it is     not written to disk, and it will not be recoverable.     Change it immediately after your first login.
  DNS records you must publish now:    ...
Copy the admin password before closing the terminal. It is only ever shown here. The plaintext is not written to disk anywhere — only its bcrypt hash. If you’re running the installer in a VPS-provider web terminal, scrollback may be limited or absent, so copy immediately.
Lost the admin password?
Section titled “Lost the admin password?”If you closed the terminal before copying it, generate a new one with:
docker run --rm \ --network vectis_vectis-data \ -v /etc/vectis:/etc/vectis:ro \ --entrypoint vectis \ ghcr.io/veltara-works/vectis-api:latest \Output includes the new password — copy it once and use it to log in.
Why not
docker compose run? A Compose v5.x bug silently disconnects the livevectis-apicontainer from its internal Docker networks during the transient-container handoff. The plaindocker run --networkform above bypasses that interaction and is safe to repeat.
Publish DNS records
Section titled “Publish DNS records”The install banner prints the records you need to publish. There are two destinations:
At your domain registrar (or Cloudflare if your nameservers point there):
A mail.example.com. → 203.0.113.10If you also have IPv6 and the v6 PTR matches your hostname, the banner will additionally print an AAAA record. If your v6 PTR isn’t set or doesn’t match, the banner will explicitly tell you not to publish AAAA — Gmail and Outlook reject IPv6 mail with mismatched PTR.
At your VPS provider’s control panel (NOT the registrar):
PTR 203.0.113.10 → mail.example.com.You should already have this set as a prerequisite. If you didn’t, do it now — outbound mail will be rejected as spam without it.
The per-domain MX, SPF, DKIM, and DMARC records come from the Setup Wizard in the admin UI once you log in — those are scoped to each mail-domain you add (e.g. example.com if you want to send [email protected]), not the server’s hostname.
Verifying the install
Section titled “Verifying the install”# All containers healthyvectis status
# Admin UI loads# https://mail.example.com/admin# (allow a minute or two for Let's Encrypt to issue the cert)Once the cert has issued, opening the admin URL in your browser should show the login screen:
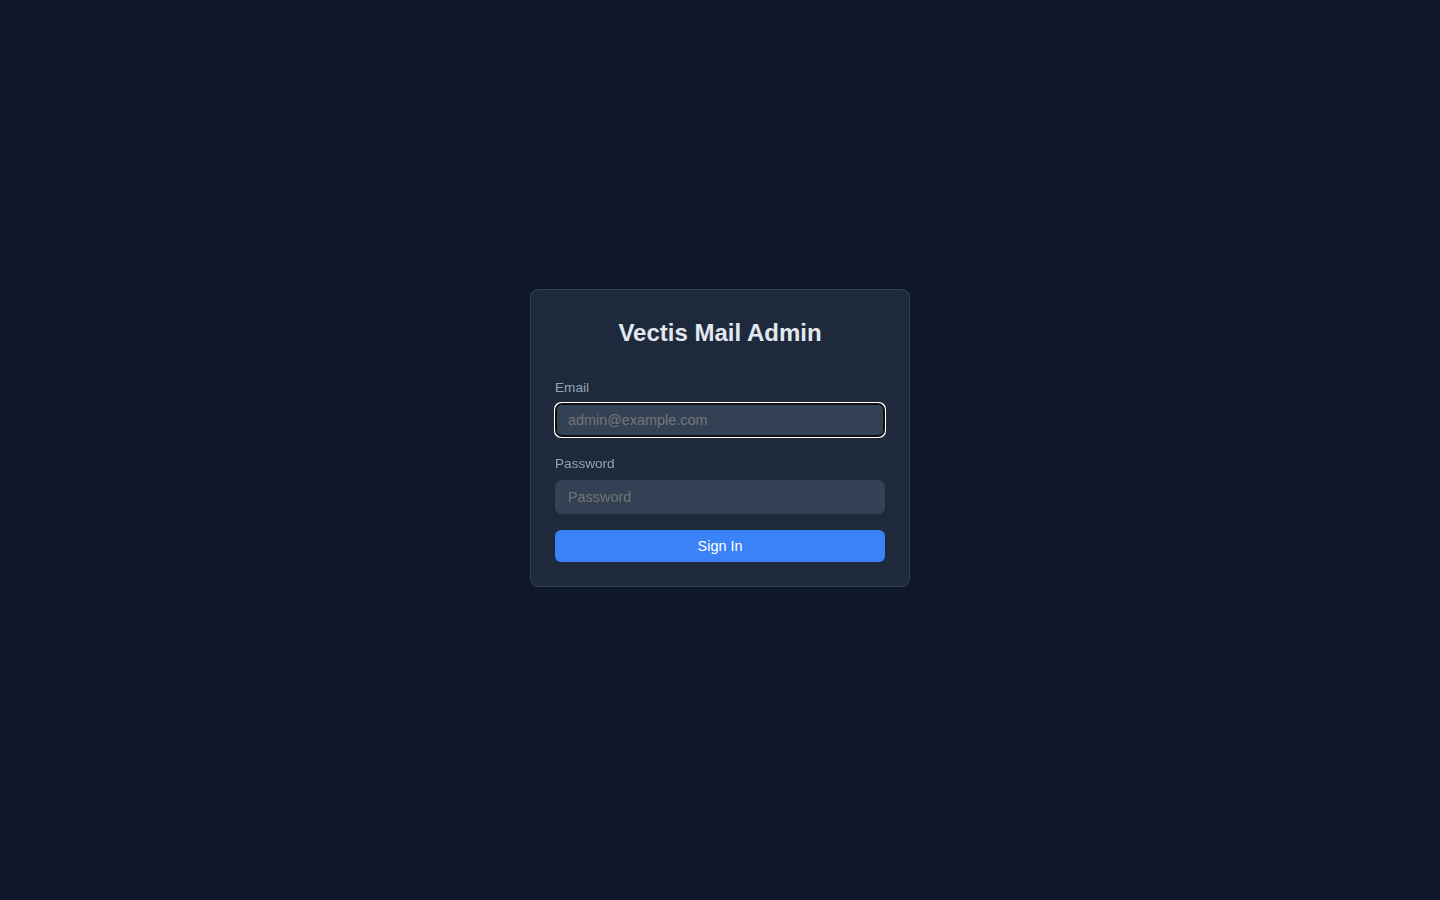
Sign in with the admin email and password from the banner. From here, the Your First Domain guide walks through the Setup Wizard to add a domain and create your first mailbox.
If the admin URL refuses to connect from your laptop:
- Check the public IP path:
curl -v -4 http://YOUR_IP/should reach Traefik (a 404 withHost: localhostis expected) - If it doesn’t, your VPS provider may have an inbound firewall — check their panel for any “Cloud Firewall” / “Network Firewall” / security group rules
Configuration files
Section titled “Configuration files”After install, your config lives in /etc/vectis/:
| File | Purpose |
|---|---|
config.yaml | System configuration (hostname, TLS, resources, features) |
secrets.yaml | Credentials (database, API, DKIM paths, OIDC, ValidonX) |
The generated docker-compose file lives at /etc/vectis/docker-compose.yml, and the rendered service configs at /var/vectis/generated/.
Changes to config.yaml are applied via:
vectis config applyThis regenerates affected service configs and reloads the relevant containers.
Next steps
Section titled “Next steps”- Add your first domain
- Configure DNS records — the per-mail-domain records (MX, SPF, DKIM, DMARC)